kimi
| 软件 | 版本 |
|---|---|
| vllm | v0.10.1.1 |
| vllm-ascend | 2bfbf9b9b3f6cd332fc438fc322b00b6053a043c |
| transformers | 4.56.0 |
其中更改当前版本信息,指定为0.10.1.1

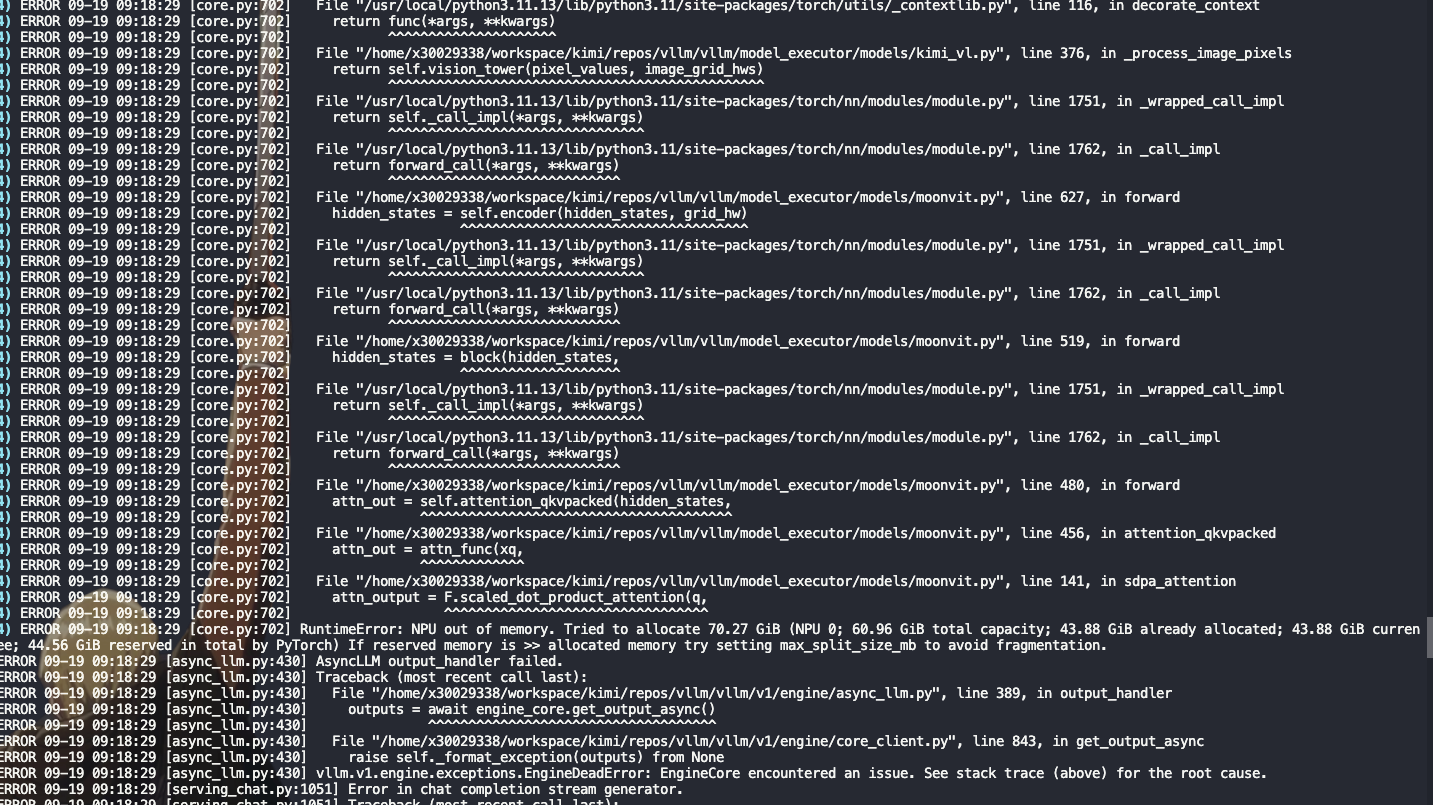
10并发出现OOM,单并发OK
unset http_proxy https_proxy
nohup ais_bench --model vllm_api_stream_chat --dataset textvqa_gen_base64  --debug &> out.log &
tail -f out.log

def ascend_attention(
    q: torch.Tensor,
    k: torch.Tensor,
    v: torch.Tensor,
    q_cu_seqlens: Optional[torch.Tensor] = None,
    k_cu_seqlens: Optional[torch.Tensor] = None,
) -> torch.Tensor:
        seq_length = q.shape[0]
        attention_mask = torch.zeros([1, seq_length, seq_length], device=q.device, dtype=torch.bool)
        for i in range(1, len(q_cu_seqlens)):
            attention_mask[..., q_cu_seqlens[i - 1]: q_cu_seqlens[i], q_cu_seqlens[i - 1]: q_cu_seqlens[i]] = True

        q = q.transpose(0, 1).unsqueeze(0)
        k = k.transpose(0, 1).unsqueeze(0)
        v = v.transpose(0, 1).unsqueeze(0)

        attn_output = torch_npu.npu_prompt_flash_attention(q, k, v,
                                                           atten_mask=attention_mask,
                                                           num_heads=self.num_heads, input_layout="BNSD",
                                                           scale_value=self.head_dim ** -0.5)
        attn_output = attn_output.squeeze(0).transpose(0,1)
        attn_output = attn_output.reshape(seq_length, -1)
        attn_output = self.proj(attn_output)
        return attn_output
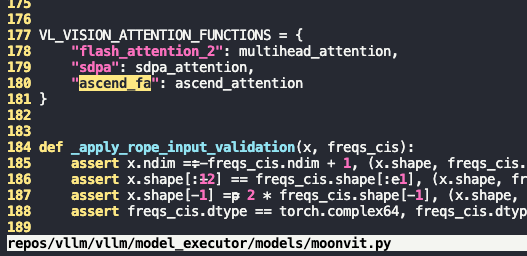
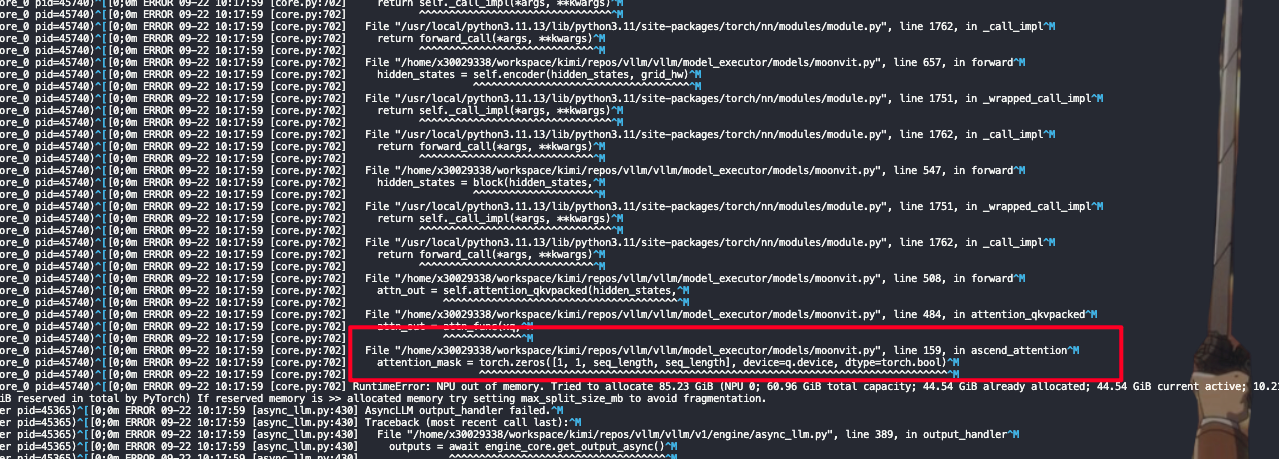
如图所示新增ascend_fa的实现,且在MoonVitEncoderLayer将默认attn_implementation由sdpa改为ascend_fa
但是最后还是一样的报错,最后还是走到了sdpa,由此可见在上游有指定默认的实现为sdpa
往上看可以发现相关的配置从vllm_config传来

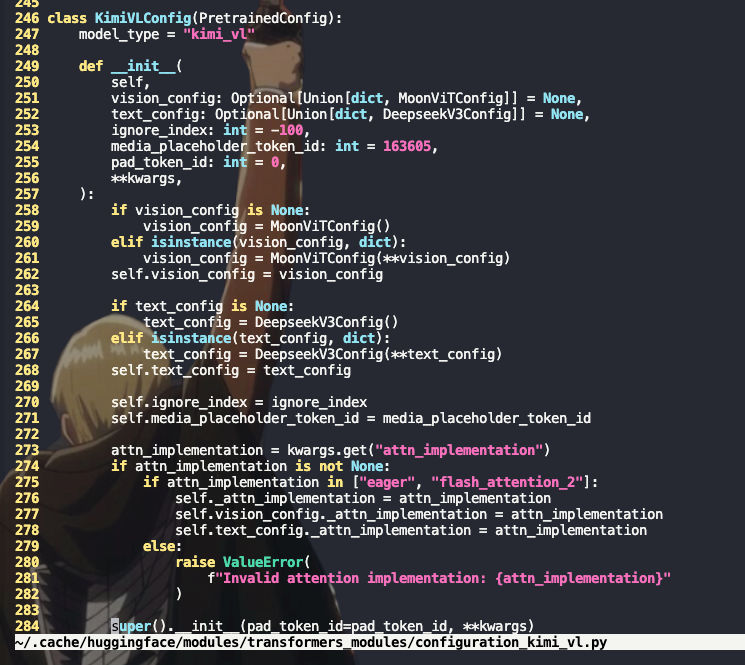
类似rednots/dots.cor的改法直接在权重config.json的指定使用ascend_fa,在modeling文件添加实现函数,但是拉起出现报错(后续测试验证,权重config.json指定attn implemenation,实现只需要放在vllm的models中,transformers中不需要)
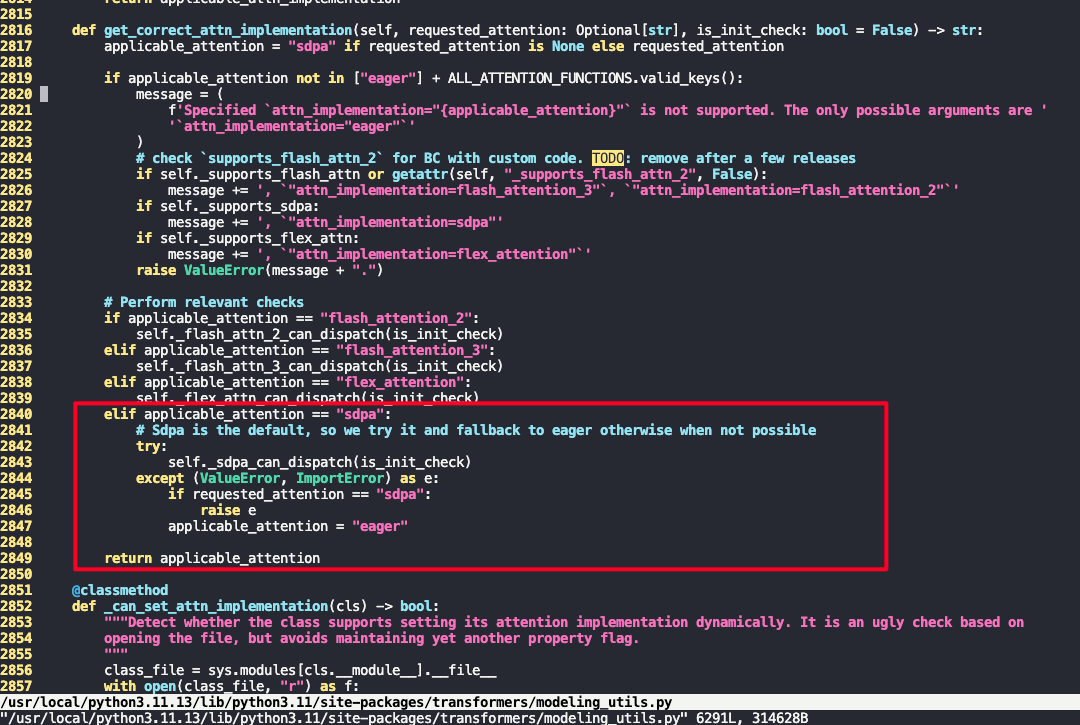

HF 的新版本(>=4.38)对 attention backend 有一层 dispatcher:
attn_implementation=None → transformers 默认会选 sdpa (scaled_dot_product_attention),因为PyTorch >= 2.0 原生支持。
只有你明确设置了 "eager" 或 "flash_attention_2",才会覆盖这个默认。
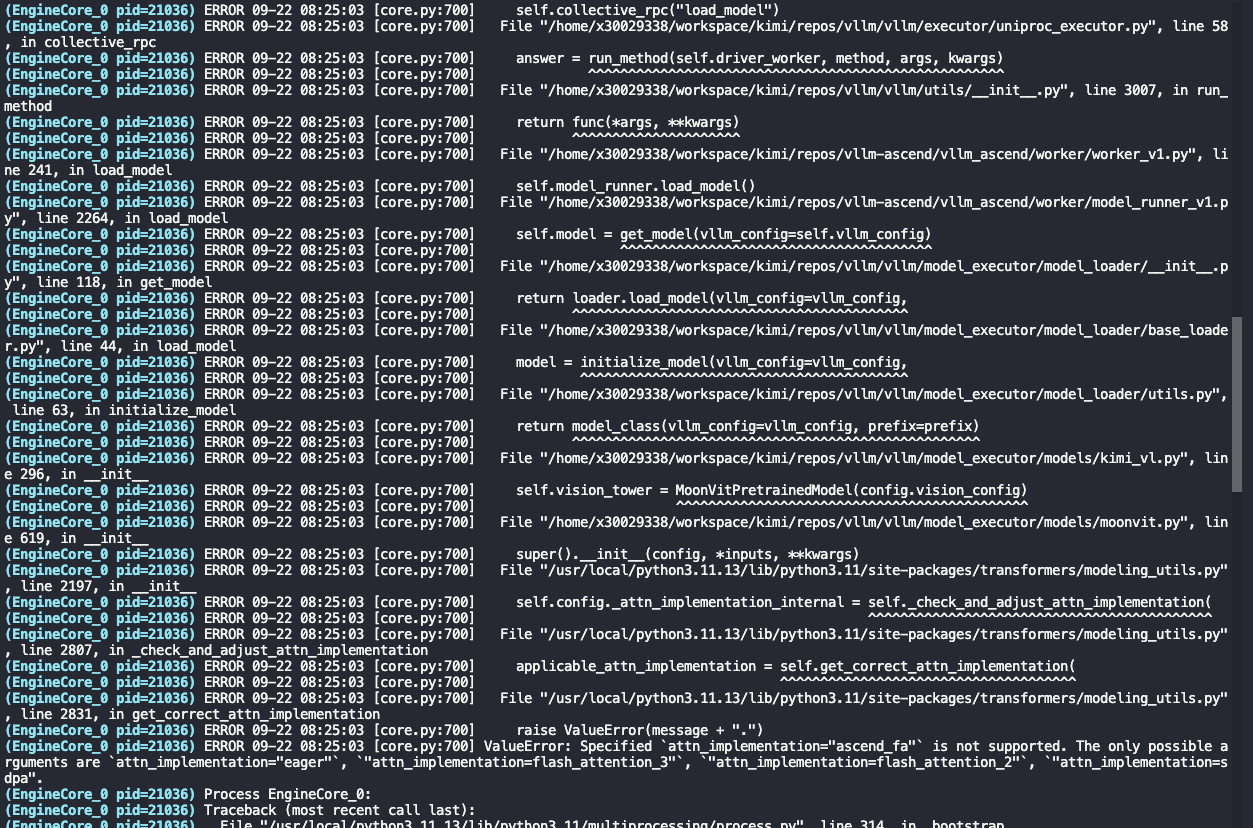
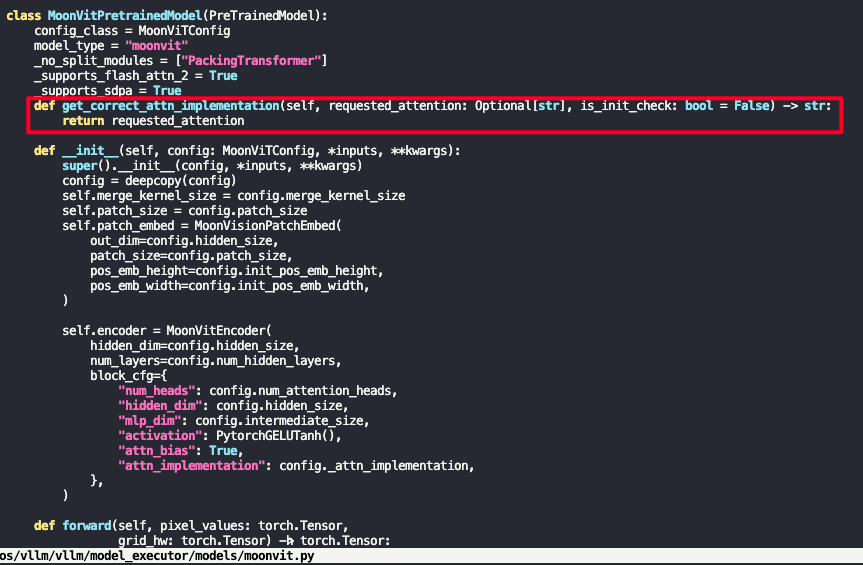
可以看到vllm中MoonVitPretrainedModel调用super.__init__()最后会走到transformers中的get_correct_attn_implementation函数来校验当前attn是否可用,我们这边不侵入式修改transformers,只修改vllm这里moonvit的逻辑, 如下可以简单在类中覆盖get_correct_attn_implementation的实现,以跳过校验
重新跑之后出现ascend_fa内self.heads not defined
def ascend_attention(
    q: torch.Tensor,
    k: torch.Tensor,
    v: torch.Tensor,
    q_cu_seqlens: Optional[torch.Tensor] = None,
    k_cu_seqlens: Optional[torch.Tensor] = None,
) -> torch.Tensor:
        seq_length, num_heads, head_dim  = q.shape
        attention_mask = torch.zeros([1, 1, seq_length, seq_length], device=q.device, dtype=torch.bool)
        for i in range(1, len(q_cu_seqlens)):
            attention_mask[..., q_cu_seqlens[i - 1]: q_cu_seqlens[i], q_cu_seqlens[i - 1]: q_cu_seqlens[i]] = True

        q = q.transpose(0, 1).unsqueeze(0)
        k = k.transpose(0, 1).unsqueeze(0)
        v = v.transpose(0, 1).unsqueeze(0)

        attn_output = torch_npu.npu_prompt_flash_attention(q, k, v,
                                                           atten_mask=attention_mask,
                                                           num_heads=num_heads, input_layout="BNSD",
                                                           scale_value=head_dim ** -0.5)
        attn_output = attn_output.squeeze(0).transpose(0,1)
        attn_output = attn_output.reshape(seq_length, -1)
        #attn_output = self.proj(attn_output)
        return attn_output
按如上修改实现之后能正常10并发压测不会出现调用fa出现OOM,但是会存在精度异常,一个Ragdoll cat的图片没法正确回答
# wget https://huggingface.co/spaces/moonshotai/Kimi-VL-A3B-Thinking/resolve/main/images/demo6.jpeg -O demo6.jpeg
unset http_proxy https_proxy
B64=`base64 -w 0 demo6.jpeg`
curl http://localhost:8888/v1/chat/completions \
  -H "Content-Type: application/json" \
  -d '{
    "model": "kimi-vl",
    "messages": [
      {
        "role": "user",
        "content": [
          {
            "type": "text",
            "text": "What is in this picture?"
          },
          {
            "type": "image_url",
            "image_url": {
                "url" : "data:image/jpeg;base64,'"$B64"'"
            }
          }
        ]
      }
    ],
    "max_tokens": 1024,
    "temperature": 0
  }'
{"id":"chatcmpl-8d3dc2e75bf348958a6cd554bed0151d","object":"chat.completion","created":1758534515,"model":"kimi-vl","choices":[{"index":0,"message":{"role":"assistant","content":"◁think▷Got it, let's try to figure out what's in the picture. First, the image is a black-and-white (or grayscale) abstract pattern. It looks like a repeated, symmetrical design with various shades of gray. The pattern seems to have a lot of geometric shapes, maybe lines or blocks arranged in a way that creates a textured or almost optical illusion effect. Since it's abstract, there aren't clear objects, but the structure is made up of repeated elements that form a cohesive, intricate design. The overall appearance is like a tessellation or a mosaic of rectangular and possibly other polygonal shapes, with varying shades to create depth or contrast. So, summarizing, the picture is an abstract, monochromatic (black, white, gray) geometric pattern with repeated symmetrical elements forming a textured, intricate design.◁/think▷The picture is an abstract, monochromatic (black, white, and gray) geometric pattern. It features repeated, symmetrical elements that form a textured, intricate design. The composition consists of variously shaped blocks (likely rectangular or polygonal) arranged in a tessellated manner, with shades of gray creating depth, contrast, and visual complexity. There are no distinct objects or recognizable figures; instead, the focus is on the pattern’s structure and repetitive, symmetrical layout.","refusal":null,"annotations":null,"audio":null,"function_call":null,"tool_calls":[],"reasoning_content":null},"logprobs":null,"finish_reason":"stop","stop_reason":null}],"service_tier":null,"system_fingerprint":null,"usage":{"prompt_tokens":222,"total_tokens":491,"completion_tokens":269,"prompt_tokens_details":null},"prompt_logprobs":null,"kv_transfer_params":null}
正常回答
{"id":"chatcmpl-a20cdb3afc454c18a6c9a500220fa7d2","object":"chat.completion","created":1758535400,"model":"kimi-vl","choices":[{"index":0,"message":{"role":"assistant","content":"◁think▷So, let's look at the picture. The image shows a close - up of a cat. The cat has long, fluffy fur, with a mix of white and gray coloring. Its face has distinct gray patches around the eyes and ears, and a white stripe down the center of the face. The cat's eyes are partially closed, and it has a pink nose. The background seems to be a textured, light - colored surface, maybe a wall or furniture.\n\nNow, to describe what's in the picture: the main subject is a cat with long, soft fur, featuring a gray and white color pattern. The cat's facial features include gray around the eyes, a white muzzle and forehead stripe, pink nose, and long white whiskers. The background is a neutral, textured surface.\n\nSo, the answer should be a clear description of the cat and its features.◁/think▷The picture features a close - up of a cat with long, fluffy fur. The cat has a color pattern of white and gray, with gray patches around its eyes and ears, and a white stripe running down the center of its face. It has a pink nose, long white whiskers, and its eyes are partially closed. The background appears to be a textured, light - colored surface, possibly a wall or furniture.","refusal":null,"annotations":null,"audio":null,"function_call":null,"tool_calls":[],"reasoning_content":null},"logprobs":null,"finish_reason":"stop","stop_reason":null}],"service_tier":null,"system_fingerprint":null,"usage":{"prompt_tokens":222,"total_tokens":495,"completion_tokens":273,"prompt_tokens_details":null},"prompt_logprobs":null,"kv_transfer_params":null}
检查发现是mask应该设置为False,之后测试精度正常,10并发textvqa数据集正常,
def ascend_attention(
    q: torch.Tensor,
    k: torch.Tensor,
    v: torch.Tensor,
    q_cu_seqlens: Optional[torch.Tensor] = None,
    k_cu_seqlens: Optional[torch.Tensor] = None,
) -> torch.Tensor:
        seq_length, num_heads, head_dim  = q.shape
        attention_mask = torch.zeros([1, 1, seq_length, seq_length], device=q.device, dtype=torch.bool)
        for i in range(1, len(q_cu_seqlens)):
            attention_mask[..., q_cu_seqlens[i - 1]: q_cu_seqlens[i], q_cu_seqlens[i - 1]: q_cu_seqlens[i]] = False

        q = q.transpose(0, 1).unsqueeze(0)
        k = k.transpose(0, 1).unsqueeze(0)
        v = v.transpose(0, 1).unsqueeze(0)

        attn_output = torch_npu.npu_prompt_flash_attention(q, k, v,
                                                           atten_mask=attention_mask,
                                                           num_heads=num_heads, input_layout="BNSD",
                                                           scale_value=head_dim ** -0.5)
        attn_output = attn_output.squeeze(0).transpose(0,1)
        attn_output = attn_output.reshape(seq_length, -1)
        #attn_output = self.proj(attn_output)
        return attn_output
但是100并发OOM,这里mask申请空间太多
10并发 seqlen 34336 8288 5328 4144 3700,
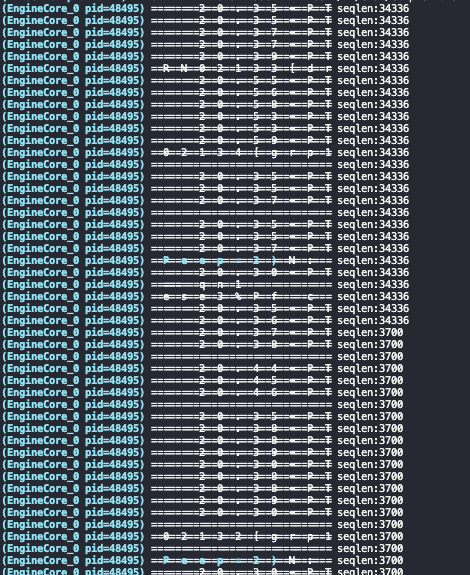
100并发:
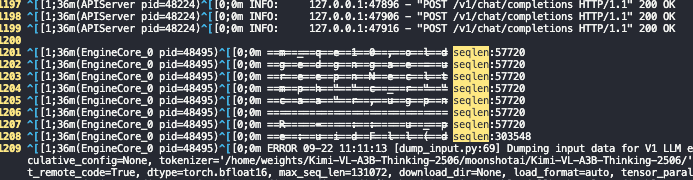
不申请mask,直接循环block attention
def ascend_block_attention(
    q: torch.Tensor,
    k: torch.Tensor,
    v: torch.Tensor,
    q_cu_seqlens: torch.Tensor,
    k_cu_seqlens: torch.Tensor,
) -> torch.Tensor:
    """
    Ascend FlashAttention 分块实现 (避免构造 S×S mask)。
    输入: q, k, v (S, H, D)
    输出: (S, H*D)
    """
    seq_length, num_heads, head_dim = q.shape
    outputs = []

    # 遍历每个 block
    for i in range(1, len(q_cu_seqlens)):
        q_start, q_end = q_cu_seqlens[i - 1].item(), q_cu_seqlens[i].item()
        k_start, k_end = k_cu_seqlens[i - 1].item(), k_cu_seqlens[i].item()

        q_blk = q[q_start:q_end]  # (Lq, H, D)
        k_blk = k[k_start:k_end]
        v_blk = v[k_start:k_end]

        # 转为 (B, N, S, D),这里只有一个 block,所以 B=1
        q_blk = q_blk.transpose(0, 1).unsqueeze(0)  # (1, H, Lq, D)
        k_blk = k_blk.transpose(0, 1).unsqueeze(0)
        v_blk = v_blk.transpose(0, 1).unsqueeze(0)

        # 注意:这里不再需要 attention_mask
        attn_out_blk = torch_npu.npu_prompt_flash_attention(
            q_blk, k_blk, v_blk,
            num_heads=num_heads,
            input_layout="BNSD",
            scale_value=head_dim ** -0.5
        )

        # 转回 (Lq, H, D)
        attn_out_blk = attn_out_blk.squeeze(0).transpose(0, 1)
        outputs.append(attn_out_blk)

    # 拼接所有 block
    attn_output = torch.cat(outputs, dim=0)  # (S, H, D)
    attn_output = attn_output.reshape(seq_length, -1)  # (S, H*D)

    return attn_output
注意看到这里sdpa都没有最后将attn_output进行proj,故ascend_fa最后实现也没有进行proj
最后测试80并发OK,100并发依旧会存在OOM,并发不宜设置过大